A new feature of 2013 are the metro-style tiles. Every new team site has them as a banner on the homepage.

To create your own tiles you are limited to the promoted links app or the Announcement Tiles feature. I wanted the ability to use the tiles in my search results and other areas as needed. I have two display templates that will allow you to do just that, with any type of content within SharePoint. The solution consists of 3 parts:
- Display Template
- JavaScript file (Used for moving panel on mouse-over events)
- CSS file for rendering the tile correctly.
Let’s get started…..
First we need to get our code and place them in their respective areas. Attached you will find the 3 files needed for this display template:
- Item_HorizontalTiles.html
- Item_VeritcalTiles.html
- Tiles.css
- Tiles.js
The item templates (Veritcal/Horizontal) need to be placed in your site collection display templates folder. The path is _Catalogs/masterpage/Display Templates/Content Web Parts/. The easiest way to do this, if you are not familiar with display templates is using the Designer manager via the site gear. When you drop these files SharePoint will automatically create a linked <name>.js file. This file contains all the JavaScript that is outlined in the display template.
Next, we need to place our CSS and JS files. I have placed mine in the /Style Library/CSS and /Style Library/JS respectively. You don’t have to place the files in this location. However, if you choose to put them somewhere else you will need to update the $includeScript and $includeCSS path in the display template HTML file.
Information about the template
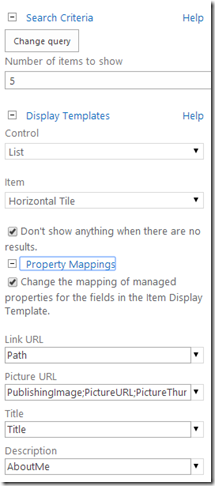
The template renders a tile similar to one you use with promoted links and announcements tiles. It allows to you to map the following fields:
- LinkURL (Auto Do Not Change)
- PictureURL (Automatically pulls the most common managed properties for images)
- Title (Title of the tile – First Line)
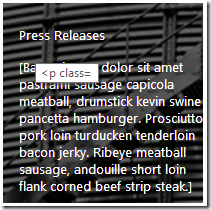
- Description (Description of the tile – Second line onmouseover)
These fields can be mapped using the Content By Search web part when the display template is selected (See below)

As you can see I am setting this first search to return people:


We could also change our query to return documents:


We could show announcements:


Note: If you just added the ‘Rollup Image’ column to your announcements, the tile would show your image on the tile as well.
We can show article pages:


You also choose to arrange these vertically using the Item_VerticalTile display template called “Vertical Tile” in the web part property selector.

As you can see, with the tile we can view any type of content we want. The HTML display template is easy enough to tailor this to any specific need or specific content that you would like. It is not necessarily a one-size-fits-all but it is a good start.
Source Files: https://github.com/kameronberget/SharePointPhiles
{Kam}


